Showing posts with label diy. Show all posts

11.29.2010

DIY Celeb Artwork

Before I get into this post I'll preface this by saying I've had this post saved in my draft for over 2.5 years. Yes, you read right and I didn't make a mistake. 2.5 YEARS. Actually, 2 years 7 months to be exact.

Not cool.

It's a good post I think and it should have been posted a long time ago...so since Apartment #412 will be going on a hiatus very soon I decided now is as good a time as any to get this up. Some of the reference might be a bit...old (like me watching Real World Hollywood)...but other than that it's all good.

Now, on to the post.

**********


Frank Sinatra

First - doesn't Frank Sinatra look cute in that mugshot? Okay, now that I've got that out of the way.

I remember reading about this idea in a magazine a few years ago but was reminded of it recently when I was watching The Real World Hollywood. If you look closely in their main living area you will see artwork using celeb mugshots.


I thought this would be a fun simple DIY to bring the look into your own space. A quick google search found TONS of pics and here, for whatever reason, are a few that caught my eye:

Jane Fonda


Jimi Hendrix

Bill Gates

I myself prefer the old-school mug shots with the numbers in them. But if you do a simple google search you can find tons of celeb mugshots. Everyone from Paris Hilton and Lindsay Lohan to Michael Jackson....and basically 99% of Hollywood. Look. 


**********


Updated to add:


I think this would look pretty cool hung either gallery style or the exact opposite - very structured. I'm not sure it would work in every decor but I think it would be quite fun in most...you could even use black and white pics to make it a bit more understated or do the pop art look as above in the RW house.

You could even have a bit of a theme...one I thought of would be prominent figures from the civil rights movement including Martin Luther King Jr., Rosa Parks, and Malcom X - I can totally see that being a conversation starter. Or if you're into young Hollywood you could do Paris Hilton, Lindsay Lohan, and Nicole Ritchie...that would be a bit funny.

There are even books filled with celeb mugshots like this one and this one. They are paperback so I'm not sure the pics from it would work to be framed but it's still kinda cool. (Wait, this one is hardcover...)

10.21.2010

DIY Pillow


See that pillow. It's made of doilies. Yes, doilies. Most people can find a huge stack of doilies at their parent's or grandparents house. And if not they cost anywhere from 0.49-0.99 each at the thrift store.

Rachel of the blog Smile and Wave made that pillow and posted a how-to. Click here to check it out.

If I weren't going to India and, you know, and still had a couch to put the pillow on, I'd totally be making one this weekend. Heck, I might take some doilies to India and make a few while I'm there. You know, to spruce up whatever cheap sofa I'll have while I'm there.


+Picture from the blog Smile and Wave

10.17.2010

the BEST ikea hack EVER

I've seen a lot of Ikea hacks but this has to be the most incredible one I've EVER seen.

From this:

To this:


Seriously, if I was not moving to India in 4.5 months I would totally be doing this. Copying it step by step - same colour and everything. (Maybe a darker stain to the legs). I love it.

Click here to read how Dan of the blog Manhattan Nest transformed the humble Ikea Fjellse bed frame into a chic upholstered beauty - with, among other things, a $25 wool blanket from the army supply store - genius! Seriously, a bed like this would cost HUNDREDS of dollars at West Elm, Crate & Barrel, or anyone of those other stores. Dan did it for $94. Plus the cost of the frame (which is like a whole 50 bucks for the queen size). 


Wicked.


Thank me later*.


(*and thanks to Anna of Door Sixteen for sharing this blog. I now have something new in my reader!)

Oh that reminds me.....

Earlier this week my new blog From India. With Love. was selected by Anna as one of her featured blogs for the month of October. It's a new thing she's doing on her newly revamped blog where, instead of a blog roll, each month she features four or five blogs she's hoping to bring a little more attention to rather than letting them get lost in a sea of links.


Ya, I know right! My new lil' ol' humble blog got the thumbs up from one of the big (and when I say big that's an understatement) dawgs. It's especially cool to me because Anna has been one of my absolute favourite reads for about two years now and one thing I've always loved about Door Sixteen is that it is ad free and she doesn't participate in link exchanges. It makes everything that she does link to feel...genuine. Like it's there because she genuinely enjoys it not because she was asked/paid/sponsored to mention it. So I'm genuinely flattered to be featured this month.

So what are YOU waiting for? If you haven't clicked over and given it a read yet go now. I dare you.

Thanks Anna!

6.15.2010

DIY Glassware Project - Updated

I posted this project yesterday and made a point of getting it done, or at least started, right away. I loved the result I'd seen Emma achieve and it was too simple to do to to put off.

So I went to my cupboard and pulled out the empty glass jars I'd been saving up. The two on the end steel need to be emptied, stripped, and cleaned...


And while these would, and will, do just fine, they are (for the most part), the same size and shape. So, I decided to hit up my thrift store to see what I could find. For the record, I'm not the kind of person who would pay for glass bottles when I can just use my own for free - but I knew I'd be able to find some great shapes for less than $2....and I didn't want to wait to empty more of my own :)

So off to thrift store where there were TONS to choose from...


I was momentarily sidetracked by all the brass....


Then I got refocused....


And ended up leaving with these...way more than I expected....


Which looks like this all laid out...


Yes, I bought EVERYTHING above (except one of the white glass milk candle sticks in the back that you can barely see) PLUS a great solid glass juice jug and paid $27 for it all. Most items were 69 cents to $1.49 and I got some great vases in various shapes, mason jars, mason jar drinking glasses, candlesticks etc. What really made my grand total 'high' was the glass juice jug ($5.99) and two...I dunno, decanters or wine thingys (seen in the far right of the photo with the glass ball stopper) that I paid $3.99 each for - for a total of $14. So I'd like to think I really only paid $13 bucks on this project.

But keep in mind, I could have totally done it for free.

Okay, back to the project. After buying all this pretty glassware I couldn't decide which I wanted to paint! "Maybe I'll just leave them as is," I thought. But I thought back to the end result and pressed on...So I chose 3 to start... (I was doing this during The Bachelorette and picked only a few so I could still pay attention to Ali and her 11 guys. Did you see the one dude, the one who got the tattoo, when he kept singing to her?!?!? OMG. I was so embarrassed I ALMOST looked away.)

the one on the far left is my sauce bottle - 
the two on the right i bought for 69 cents each

paint in the vase as I move it around to get it coated...

upside down to drain excess paint...

I turned one right-side up to snap a picture so you could see the result.
I LOVE!


I'm going to do some more and then will post a picture of them all.
This project was perhaps one of the easiest & cheapest I've ever done and I'm thrilled with the results.
I can't wait to display them - with flowers and without.

(thought - wouldn't it be fun to do some in black and use them to decorate your 
table for a halloween party? actually, you could do them in any colour for any occasion.)

6.14.2010

DIY Milk Glass-ish Bottles

I saw this DIY project in the April issue of Canadian House & Home magazine but it wasn't until I saw it executed by blogger Emma of the delightful (new to me) blog The Marion House Book that I decided I was going to do it myself.

Here's the picture that accompanied the article in House & Home mag:


And as executed by Emma:


dressed up with flowers
click here to see more

She chose to stick with one colour and I think it looks incredibly chic. Best part, all you need are some glass bottles/jars and paint. I have tons of jars I've saved up (from pasta sauce, jams, olive oil...) that I've been wondering what the heck to do with and now I know. Easy peasy.

Looking forward to getting this DIY crossed off my list this week today. Stay tuned.

Super easy steps for this diy here.

*Even if you don't use them for flowers, how great would they look grouped together and on display as a collection or a little vignette?

(1) canadian house and home magazine (2-3) the marion house book blog

12.09.2009

Not All My DIYs Work Out...

...at least not on the first try. But this is one I'll definitely be attempting again. Least you all think that all of my DIY projects turn out half-decent or blog-worthy on the first shot I decided I'd share one I just worked on (as in last night & this morning) that didn't quite go so well (but has loads of potential I think!).

Ions (or is it Eons?) ago, I spotted a black & white chevron tray that I thought was fab! I'm pretty sure it was Oscar de la Renta which means it was totally out of my budget but I've kept it tucked away in my memory since I really adored it.


Found a picture! Chevron print tray by Oscar de la Renta

Anywho, whenever I'm at the Dollar Store I notice these thin un-finished wood trays that they sell for $1.25 and I finally decided yesterday to try and recreate the chevron print on it.

I started with the unfinished tray:


And painted it white:


Not bad at all...

When I couldn't remember where I'd put my painters tape I knew this would end up being a trial run but still had high hopes for it. So I used masking tape and attempted to tape out a chevron print. This is MUCH harder than it looks. Note to self - find a chevron stencil for the next attempt!

Then I painted it black:


And after about 10 minutes (I was totally impatient) I removed the tape and voila:


Now, in the above photo it might not look too bad & in-person from a few feet away it's not. But get in close and you notice where the black paint seeped under the tape in some spots:


YIKES!

Yup. I just posted that horrible DIY pic. Proof that I'm not the Queen DIYer - but that doesn't stop me from trying! (and it shouldn't stop you!) All-in-all, despite that pic, it's not too bad. I may just touch it up with some white paint but the perfectionist in me knows I'll just do it again. It was easy and quick...and cheap. $1.25 people! And for those of you wondering where you might use it - because the wood is not that strong I wouldn't use it for heavy stuff - but you can use it anywhere where you need to keep small things together. Like on a console near the entryway for keys, iPods and glasses. Or on top of the toilet with a nice candle and bathroom stuff, or on your coffee table for remotes, on your desk with a nice glass holding pencils/pens and other office-y stuff...tons of possibilities!

Wish I'd Thought Of This


This wreath is SO beautiful. A simple DIY made of circle pieces of felt shaped like ruffles.
Definitely making this at my first excuse to hang a(nother) wreath.
Click here for the super easy, detailed how-to.


As seen on Design Sponge via Domesitfluff.

12.06.2009

My Holiday Decor...& a Very Sparkly Tree

Earlier in the week I promised I would share some of my decorating DIYs so here goes - I didn't do very many. I stuck to 2 or 3 and did lots of those ones. I can't stress enough how much of an impact having a tree has made. I carved and bought one, my original plan was to do small vignettes, but nothing says Christmas like a sparkly well lit tree - so no regrets.

I picked out J-O-Y wood letters at Walmart (craft section) for $1.47 each (though I later saw them at the dollar store for...$1 each) and painted them white (leftover paint).


Then casually propped it on my bookcase. Total cost = $4.41. I think I'll be picking up 4 more letters spelling NOEL for the bathroom.


I also found these thin wooden words at the dollar store. It came in a package of 4 for $1 and I picked up the packs Hope, Peace, and Noel (total 12 pieces). I didn't know what I was going to use them for but decided I'd find SOMEWHERE to use them.


Again, I painted them white and used 2 to dress up my potted plant.


Then after I bought my tree I decided to use the remainder as ornaments. I bought gold ornament balls for the tree and in the pack was gold thread so I just used those on the words.


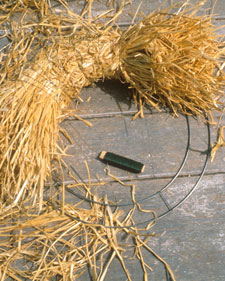
Next, the feather boa. I planned to buy a foam wreath from the craft store but it was something like $16. Uh, I'm super frugal on some stuff so I kept looking. In another aisle I found hay wreaths for $6 that had a bigger circumference. I figured I was going to wrap it anyways so who cares if it was hay? When it scanned it was 50% off. So I grabbed another one and got 2 for $6. Score! (sorry no pic but it looks like this one)

Then I bought 4 feather boas from the dollar store ($2 each) and wrapped one wreath (using straight pins to make them stay in place). The end result....


The picture doesn't do it justice. Really, it's quite 'wow.' I didn't know where to hang it so I put it behind my door and tied a white bow on the top. Easy peasy. Seriously, anyone can do it.

I put some of the gold ornament balls and small sparkly pine cones in my anthropologie bowl and put it on my coffee table. Very pretty (sorry, forgot to take a picture but you can see the small pine cones above with the painted words).

Next the tree. I wanted to use hot pink balls but when I went back to the store they were all sold out :( so I used gold. Very simple and kinda glam. Now for a gazillion photos of my tree because I love it.

Ooohhh sparkly!


Flat coloured gold balls...


Glittery gold balls...


Sequined gold balls...


Shiny gold balls...


I picked up a hot pink feather ball ornament and decided to use it as a temporary tree topper (whoops! gotta take the tag of it since I think it'll be a keeper)...


The entire tree...Please ignore the temporary drapes. I got the fabric at Ikea to test out how I would like it as curtains but I've since decided I'll be going with plain grey curtains. Now to find some!


I draped a piece of zebra print fabric I have (still gotta make a floor cushion with it) around the base of the tree as a tree skirt...


Howard looked very unimpressed by all my picture taking....


But he quickly got over it. Within minutes of this photo he began sniffing the ornaments balls within reach. So that is the majority of what I've done. It sure doesn't sound like a lot but along with the white ceramic reindeer on my bookshelf, twine cones, big sparkly cones, lights hung at the window, and the other things seen in the first post - it's just enough.

So what do you think? And how's YOUR decorating coming along?

11.24.2009

Ruffled Scarf Found! Kinda...

Do you remember this ruffled scarf I fell in love with and blogged about here?


Well look what Maegan (a fashion blogger of the blog ...Love Maegan) made!


Tutorial here. As soon as I find the foot pedal thingy for my sewing machine I'm going to try and make this. She has dozens of other amazing DIYs so be sure to check them out.

Oh, she also recently posted this next outfit. And while I'm not normally a person who likes cutouts or embellishments on stockings I saw these and was immediately in lust.


So. Freakin'. Hot.

ETA
Maegan notes that the leggings are Givenchy & that she bought them back in 2003 and JUST wore them for the first time.

11.12.2009

Pine Cones & Twine Cones

Earlier this week I did a quick post about some of my DIY pink & gold christmas decor. Though it's certainly not rocket science I wanted to do a follow up post on how I did it (and where I got my inspiration from) for those of you that might be interested.

Like I said before I live in a small apartment. And while some may find decorating a small apartment challenging, I find it gives me the opportunity to, on occasion, be extra creative and to think outside of the box. Because I don't want my space to feel cramped and crowded - and I just don't have that much space to begin with, I've decided for my holiday decor I'll be sticking to a few, but hopefully impactful, vignettes around the apartment. (I'm still debating a tree...)


The first projects I began working on were glittery pine cones and, what I've named, twine cones. I was at West Elm and loved the simplicity of the limited-edition holiday collection created by David Spark but was not in-love with the prices. So I decided to DIY them.


First up glittery pine cones (I swear I took pics as I was doing them but can't seem to find them). It's super easy. All you need are glitter, pine cones, glue, and newspaper. I bought a huge shaker of gold glitter  at Walmart for $2.95 and picked up a coordinating 3-pack of pink glitter from the Martha Stewart line (again at Walmart) for, I think, $7. I was tempted to go for plain white glue because it was cheaper but I'm so happy I went for spray glue (I think $6 Walmart). Using spray glue made the entire project super fast whereas I imagine brushing on white glue would be a bit more time consuming (but doable none-the-less). I used the newspaper to catch the falling glitter and pour it back into the shaker (no waste here!). Then all you do is spray - shake on glitter - gently tap the pine cone so the excess to fall off and then put it aside to dry. That's it. It's so easy and I think the way the sunlight catches it and makes it seemingly shimmer is so pretty. The pine cones I've done are large ones I bought ages ago on sale for about $5 (for about 10) but I plan on doing some small ones too and piling them into a shallow bowl on my coffee table. (TIP: You can simply collect small pine cones from outside but shake them out well to get all of the small creepy crawlies out of them. Or you can just buy pine cones. I saw some at the dollar store.)

Next up twine cones. I love the sculptural quality of them. All you need are cone forms (I used cardboard ones from the craft store but I think you could use styrofoam), twine or yarn (dollar store) and a glue gun. Start at the base and just wrap & glue, wrap & glue, wrap & glue......and that's it.


I did the first 2 with twine and then got the idea to use yarn for the last one. I must admit the twine was a bit easier to work with since the glue string blended in with the twine whereas I had to be a bit neater when using the yarn. Either way they are both TOTALLY easy to do. I'm on the hunt for some taller cone forms and will then group them on my newly purchased dining table as another vignette...and perhaps add a gold star (made of pipe cleaner) to the top for a more festive look.

I did both of these projects while watching TV so really - they couldn't be any easier.